A couple days ago I gave my SO Wainlux K8 laser engraver. We were excited to try it out, but we quickly realized that the camera feature wasn’t working with Lightburn. I searched online for a solution, but I couldn’t find anything.
Sadly, manufacturer software is unusable - it’s buggy, slow, and doesn’t work on Linux.
With tcpdump sniffing packets in the background, I found out that when you press the screenshot button in the CutLabX, it sends
a GET request to different IP address than the K8 itself. So, camera feed is available on a different IP address
than the K8 itself. It turns out that there are network 2 devices in the K8: the engraver itself and the camera.
Also, the camera feed is just static image, not a video stream.
Upon further investigation, K8 has 2 ESP32s inside:
- first one running Grbl_Esp32 for the motion control, networking and controlling laser
- second with ESP32-CAM or some fork of it for serving static image
So, it should be easy peasy to get the camera feed working with Lightburn, right? Well, yes.
I decided to write this guide to help others, because I couldn’t find any in the Internet.
Prerequisites
- Wainlux K8 Laser Engraver
- A computer with internet access
- Basic understanding of HTML and network settings
- CutLabX app installed on your PC or Mac
Steps
1. Connect Wainlux K8 to Your Home Network
- Turn on your Wainlux K8 and connect it to your home WiFi network using the CutLabX app. You can use official guide for reference.
- Find out the IP address of your K8, you can see it in the bottom right corner:
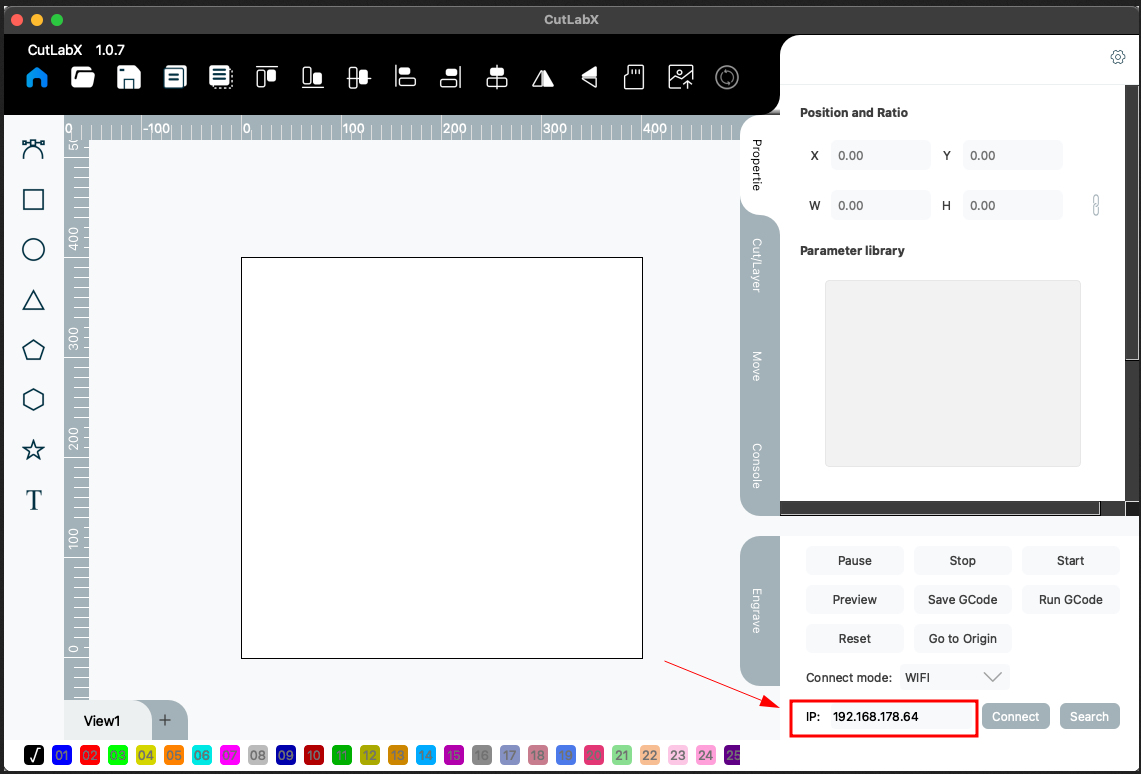
- Write down or save the IP address for later use.
2. Find the Camera Feed URL
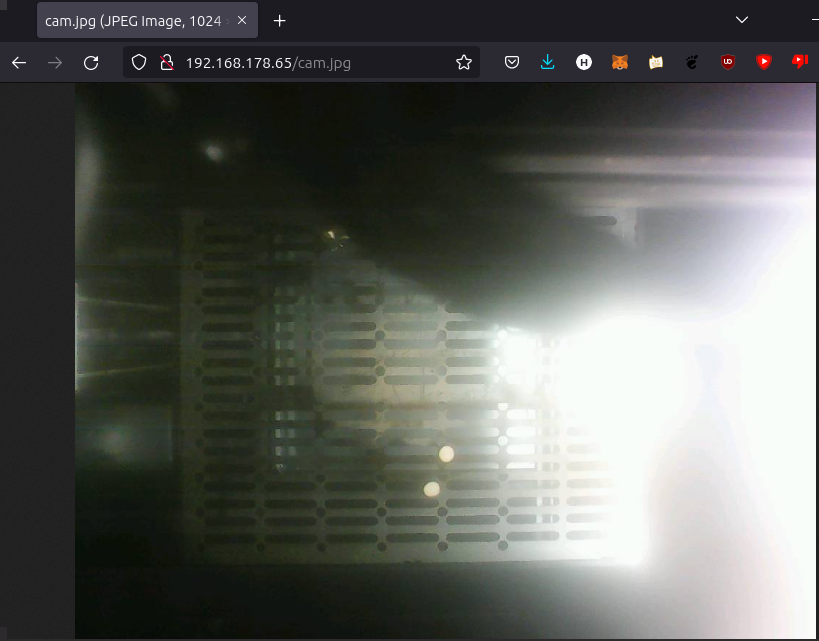
- Open any browser on your computer and enter the following URL:
http://[XXXXX]/cam.jpg- replace[XXXXX]with the IP address you wrote down earlier, but add1to the last octet. In my case,CutLabXapp shows192.168.175.64, so I need to use192.168.175.65. - If you see a camera feed, you’re good to go. If not, try to find the addresses around (by adding or subtracting 1 from the last number).
If it still doesn’t work, you might want to use a network scanner or just try to find the camera IP in your router’s admin panel.
- Write down or save the camera feed URL for later use.
This is needed, because the camera feed is not available on the same IP address as the K8 itself. Usually, it’s the next address in the network due to DHCP.
3. Create a Refreshing Webpage
- You’ll need to create a simple HTML page that refreshes automatically every X seconds (in my case it’s 5000 ms) to display the camera feed.
- In any text editor, create a new file and paste the following code:
<!DOCTYPE html>
<html>
<head>
    <style>
        iframe { width: 100vw; height: 100vh; border: 0; }
    </style>
    <script>
        function reload() {
            setTimeout(function() {
                document.body.firstElementChild.src += "", reload()
            }, 5000)
        }
        reload();
    </script>
</head>
<body>
    <iframe src="[XXXXX]"></iframe>
</body>
</html>
- Replace
[XXXXX]with the camera feed URL:http://[Wainlux_K8_IP]/cam.jpg. In my example, this ishttp://192.168.178.65/cam.jpg. - Save the file as
page.htmlin any location. - Test the page by opening it in a browser. You should see the camera feed and it should refresh every 5 seconds.
4. Set Up OBS (Open Broadcaster Software)
- Download and install OBS from its official website.
- Open OBS and create a new scene.
- Add a source to the scene by choosing ‘Browser’:

- Set the URL to the location of the HTML page you created earlier, checkmark
Local file, set the width and height to 1024x768: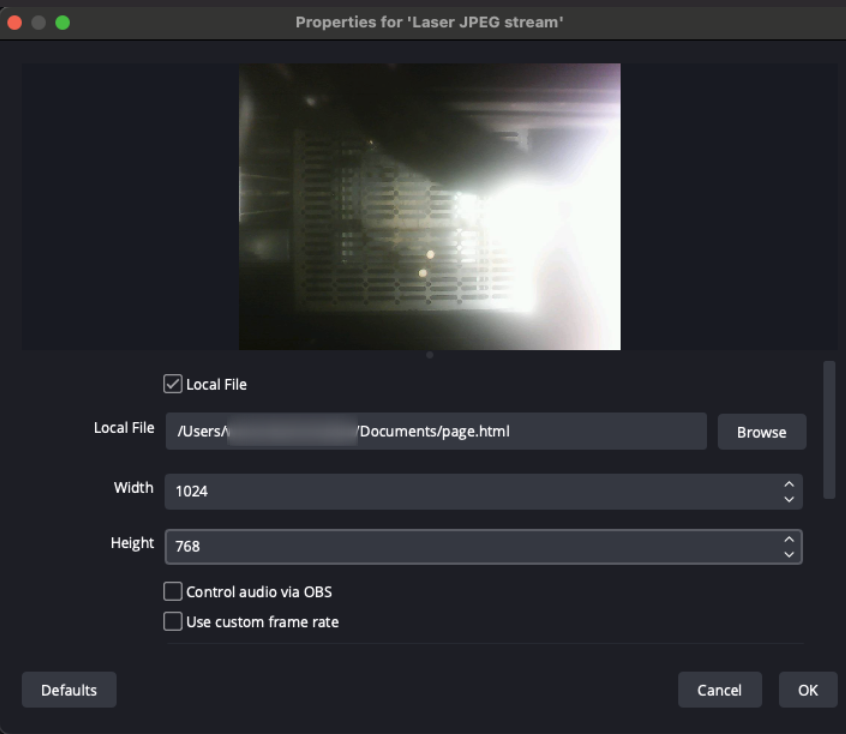
- Enable
Virtual Camerain OBS. This makes OBS stream the content of the scene (i.e., your HTML page) as if it were a webcam.
5. Integrate with Lightburn
- Open Lightburn, connect to your K8 via USB, and open the camera control panel.
- Go to the camera selection settings.
- Select
OBS Virtual Cameraas the camera source.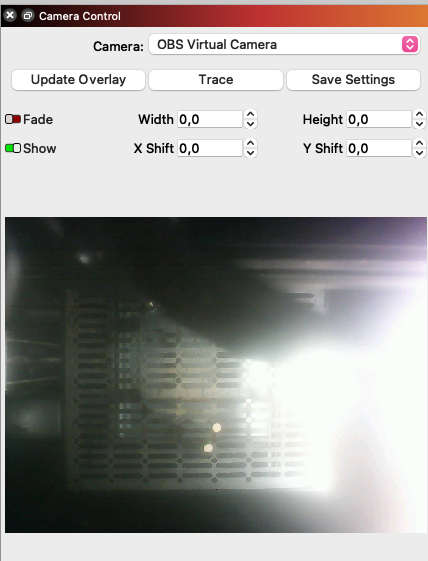
6. Calibration
Now, you can proceed with the calibration for the lens and position within Lightburn. There are plenty of guides, so I won’t cover it here.
Conclusion
That’s it! Now you can use the camera feature in Lightburn with your Wainlux K8 laser engraver. I like this little engraver, it’s a great way to get started with laser engraving.